User Management
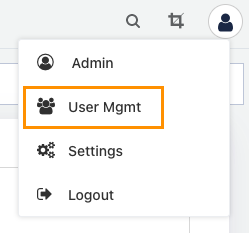
Acceldata's User Management section in Torch allows you to manage your users and their associated roles. Click the User icon and click User Management to create and manage roles and users.

Acceldata Torch ships with the following two roles:
- Super Admin: Super Admin is a super user with permissions to all the pages and actions.
- User: Super admin has capability to create users. A super admin can grant access to view any page and perform any actions in the UI. Super admin can restrict users from viewing any page in the user interface.
Roles Configuration
Roles can be configured only by a super admin. Consequently, the User management icon is visible only if you log on to Acceldata as a super admin.
Click the Roles tab to manage roles. You can also configure the left navigation menu, actions, queues and users that a role can see while creating a role definition.The Roles page lists all the roles available in the system.
note
- AD Mapping: Roles can be mapped to either groups or users fetched from Active Directory or users can be configured in the Acceldata platform.
Create a Role
To create a role, do the following:
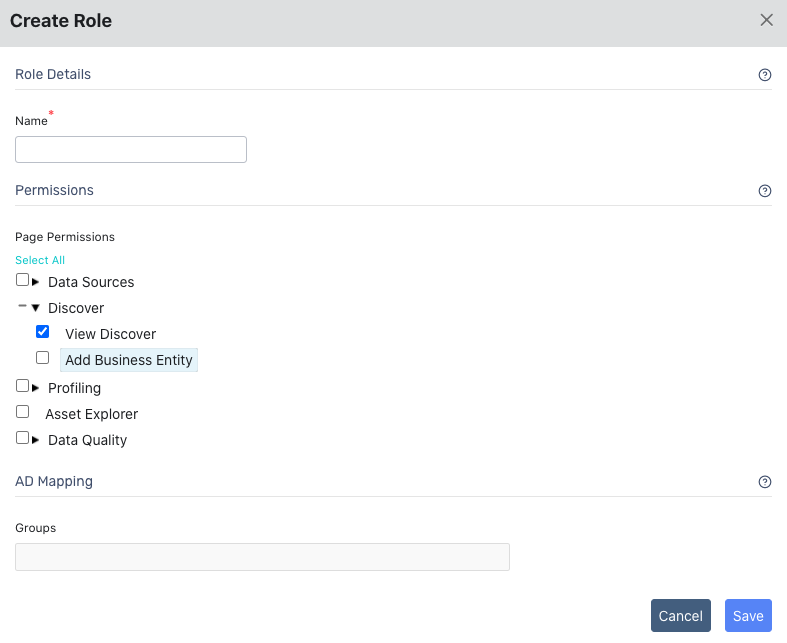
Click the Create Role button. The Create Role wizard is displayed.
Specify a name for the role.
Under Page Permissions, select the pages that you want the user associated with the role to view in their side navigation menu.
note
Some pages may have sub topics within them which can be again selected individually. Only the selected topics in the page are displayed in the side navigation for that particular role. On selection of a page, all the topics within it will be automatically selected. Click the right pointing arrow key to view and uncheck the topics that shouldn't be visible for the role.
important
Some pages have options that do not exist in the side navigation. These options are actions available on that page. For example, the Discover page in the side navigation does not consist of any sub topics. However, in the Create Role wizard, the Discover topic has sub options or actions that can be performed by a user. One of the actions in the Discover topic is Add Business Entity. If this option is not selected, a user with the Add Business Entity role will not have permissions to add a business entity and will not see the Add Business Entity button on the Discover page.
Under Ad Mapping, specify a group that can be mapped to the role.
Click Save.

Edit a Role
To edit a role, do the following:
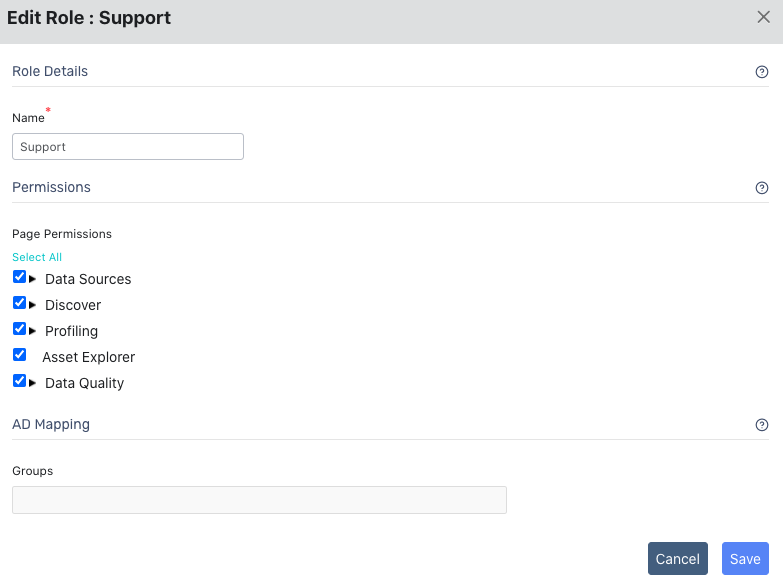
- From the list of roles in the Roles page, click the name of the role you want to edit. The Edit User wizard is displayed.
- Make your changes and click Save.

Delete a Role
To delete a role, do the following:
- From the list of roles in the Roles page, click from the end of a Roles row. A drop-down menu is displayed.
- Select Delete to delete the role.

User Configuration
Create a User
To create a user, do the following.
Click the Users tab. The Users page is displayed.
Click the Create User button. The Create User wizard is displayed.
Specify a username.
Specify a password.
Confirm the password.
Select a role.
Click Save.

Edit User Details
To edit user details, do the following.
From the list of users in the Users page, click the name of the user you want to edit. The Edit User wizard is displayed.
note
The User Name cannot be edited.
Make your changes.
Click Save.
note
The admin is a user whose details cannot be edited but can be viewed.

Delete a User
To delete users, do the following:
- From the list of users in the Users page, click from the end of a user row.
- From the drop-down menu, select Delete to delete the user.
